Introduction
Personal videos & photos, bank account, contact list, business secret… everyone has some important data that should never be lost. To backup them is a necessity. Magic Burning Toolbox contains a data CD/DVD burner tool that can burn whatever data you have, files or folders, to CD and DVD discs.
Step 1. Launch Data CD/DVD Burner
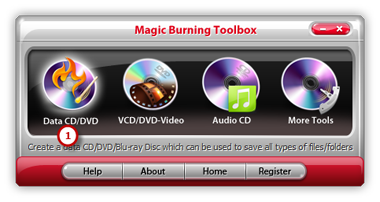
Launch Magic Burning Toolbox. Insert a blank CD to the CD drive, click “Data CD/DVD” to run the data CD/DVD burner wizard.
Step 2. Select Usable Burning Device
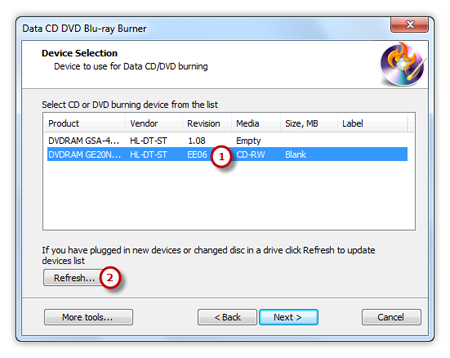
The burner will scan your system and list the available devices. Choose one of the usable burning drives from the list (the system will select it by default if there is only one). The “Refresh” button is provided to help you update the devices list in case you plug in new devices or changed disc in the drive.
Step 3. Choose File System
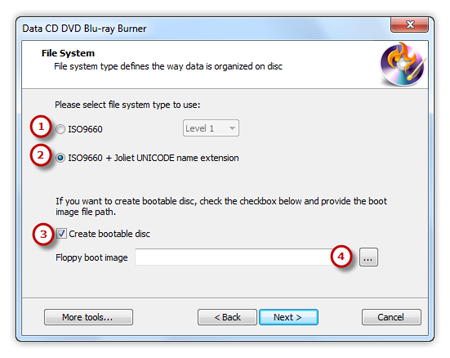
Choose a system type to store the data. You can select one from ISO-9660 and ISO-9660 + Joliet UNICODE name extension . You may check the “Create bootable disc” and click the square button to find and open the boot image files to create bootable disc.
Step 4. Add Data Files
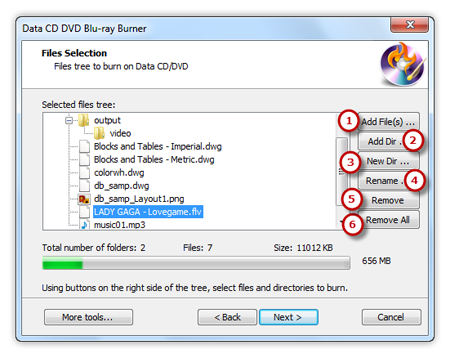
Click “Add File(s)…” & “Add Dir…” to add data files & folders you want to burn and use “New Dir…” or “Rename Dir…” to create or rename the folder. Also, you can click “Remove” or “Remove All” button to remove one or all files & folders.
Step 5. Select Burning Mode and Burning Speed
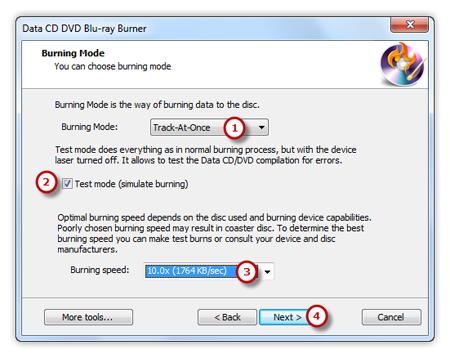
Select one burning mode from the Track-AT-Once, Session Track-AT-Once, Disc-AT-Once PQ and Disc-AT-Once raw P-W as needed . You are allowed to use Test Mode to simulate burning for checking errors. Then, choose the appropriate burning speed . Click “Next” to start burning and wait until the process bar reaches 100%. The disc will eject after the data CD/DVD has been completely burned.
