Introduction
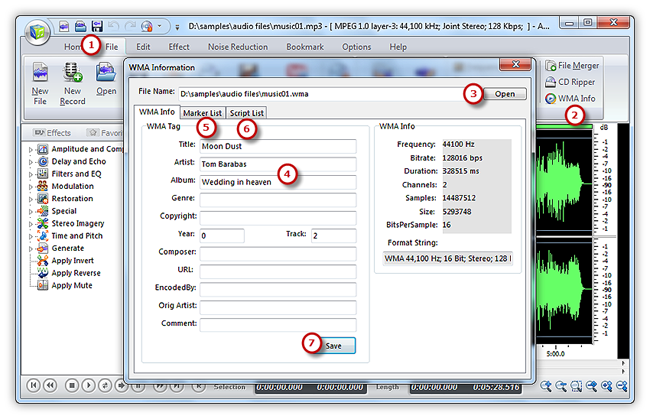
ID3 is for MP3 inside information. It’s the ID3 tag that makes it possible to see the track names and info when you stick someone’s CD into your computer. Similarly, WMA info tag also gives the track information of a WMA file. Audio Record Edit Toolbox Pro contains both ID3 editor & WMA info editor to help users insert songs’ title, artist, time, album name and more for convenient identification and management.
Step 1. Input an Audio File
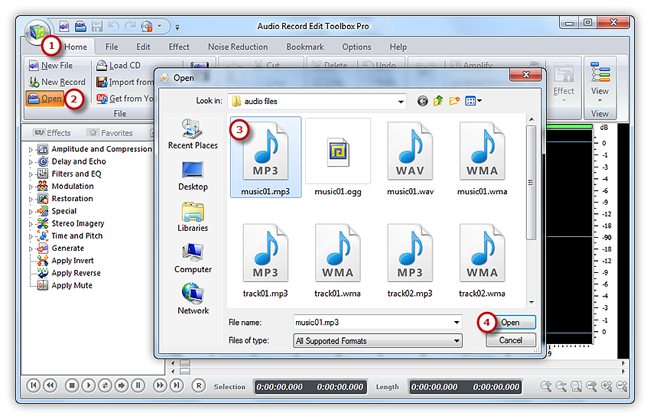
Launch Audio Record Edit Toolbox Pro. Click “Home” tab of the Ribbon Command Bar and choose “Open” to activate a browser window, in which you can select an audio file from your computer. Then, click “Open” to input the MP3 file to program. (You can add more than one audio file to the task window to edit.)
Step 2. Edit the ID3 Tag & WMA Info
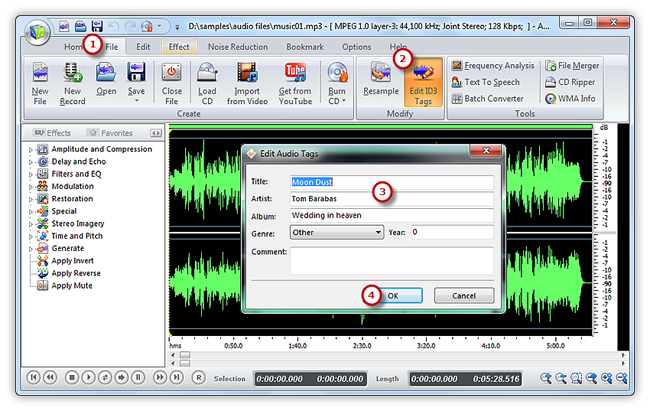
Now click “File” tab of the Ribbon Command Bar to choose “Edit ID3 Tags” to activate the ID3 tags editor window. You can enter various information, such as title, artist, album, genre, year and comment to edit ID3 tags. Then, click “OK” and immediately you get the ID3 information added.
Step 3. Save the Changes
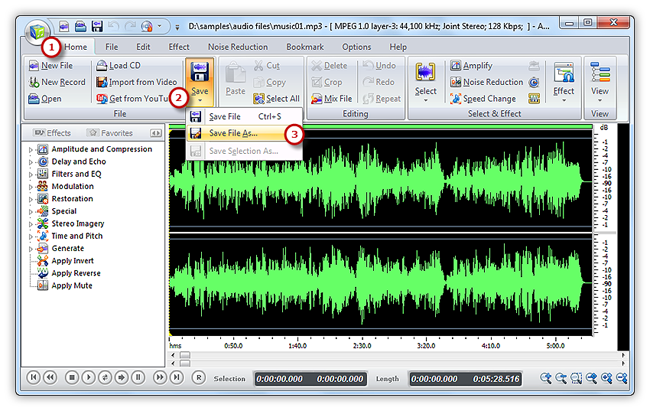
Now go back to the “Home” tab and click the “Save” button to save the changes to the original file or click “Save As” to save the changes with a different file name and/or location (After that you can select the output folder and format as well as adjust the output quality).
Step 4. Join Audio Files
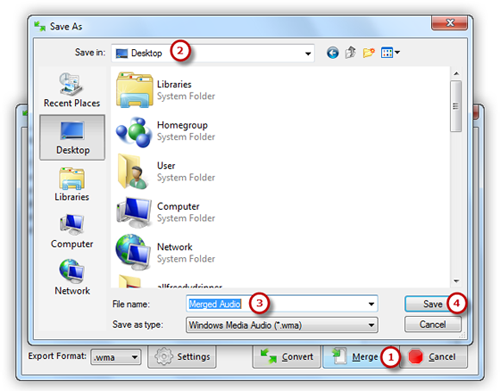
Click “Merge” to select the output folder and give a filename for the merged audio file in the browser window (You can choose “Convert” if you want to convert audio files). Then, click “Save” to start merging. The audio files are completely merged when the process bar disappears. Now, you can enjoy the merged songs on your music player.
